How to configure the push notifications service in Vocechat?
The administrator needs to configure FCM in Firebase Cloud Console.
⚠️ Please be noted that Push Notifications will NOT be available on mobile devices (iOS and Android) if a customized configuration is applied. This is because of Push Notification project signing mechanism. In this case Push Notifications will only be available on web clients. A default Firebase configuration is privoded in the latest web client. You may check at Settings -> Firebase using an admin account. A long-term plan will solve it by providing SDK, which will support self-signing.
⚠️ If the VoceChat backend is deployed in Mainland China, Push Notifications may not be available because of Internet regulation, as the Push Notifications service is based on Google Firebase. We are working on an alternative directly supporting APNs and other Android services in Mainland China.
Firebase settings
The administrator needs to first create the firebase project and has added the corresponding service code to the project. If you have completed the above steps, you can skip this paragraph; If not, see FCM.
Get the configuration file from the
Firebaseconsole Access Firebase Console, Click the gear icon on the left sidebar to enter Project Settings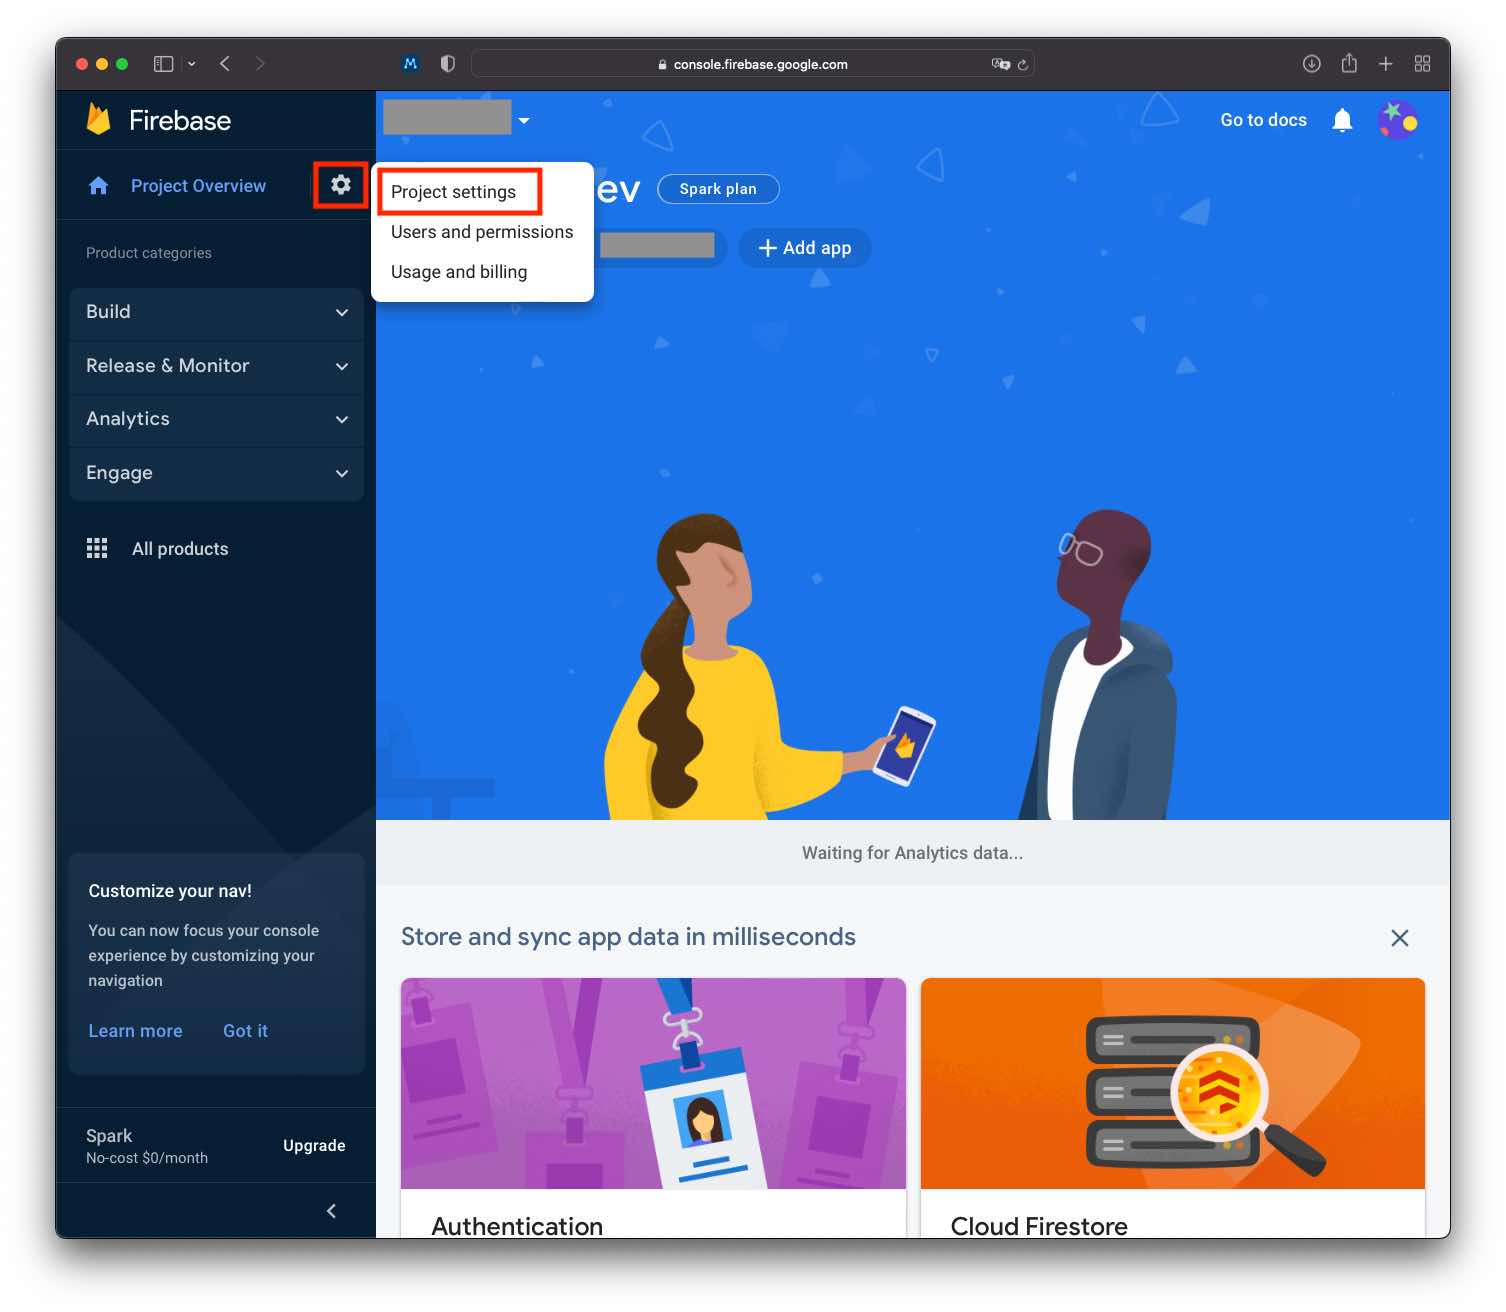
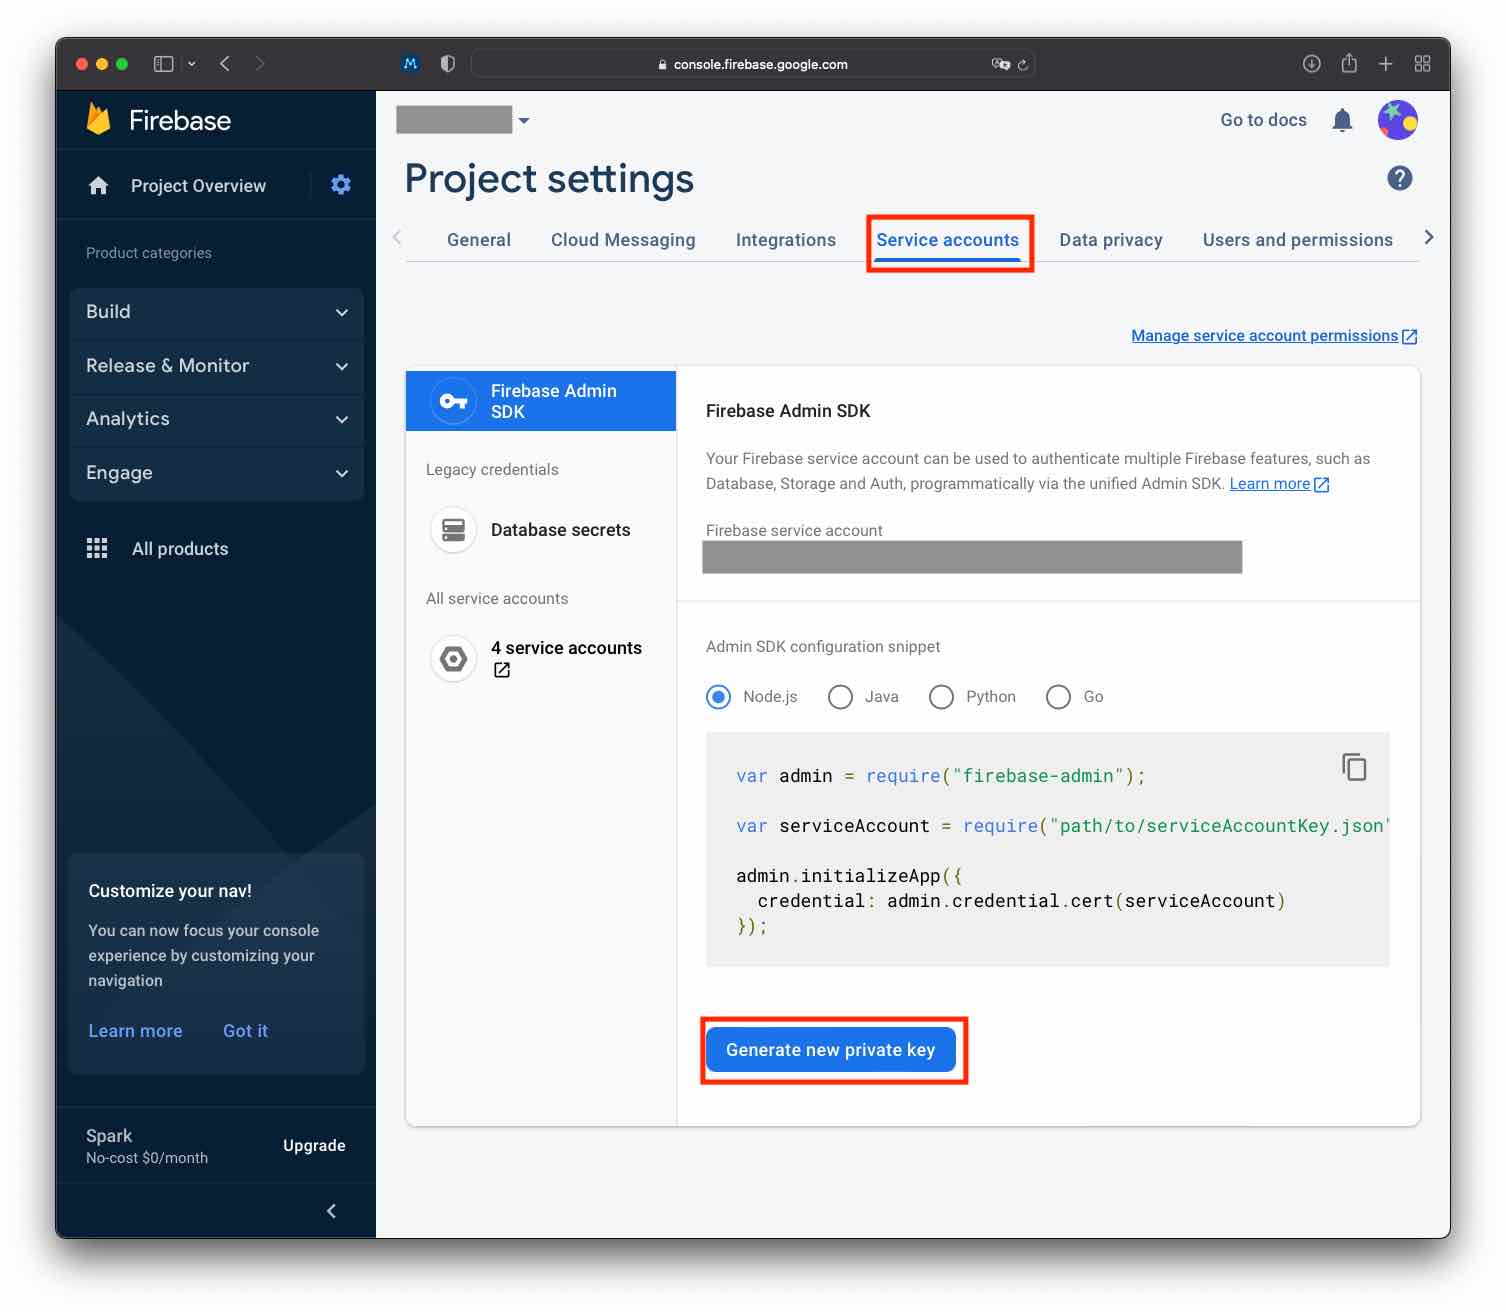
Then, in the horizontal tab at the top of the page, select Service Accounts. Drop down the page to the bottom, click generate new private key, and save the downloaded JSON file properly.
Copy relevant configuration items to voce chat settings Enter VoceChat Settings page, select Firebase in Configuration. Four configuration items can be filled in this page, namely token URL, project ID, private key and client email. You can download in step 1 above, find the corresponding field in the JSON file, copy and paste it, and then save it.
